Creating a Title or Summary band within the Label or Report Designer allows you to create custom content that will print once per print job--at the beginning for a Title band, or at the end for a Summary band. Below are instructions for creating custom Title and Summary bands. These instructions will pertain to modifications you can make while in the Label or Report Designer exclusively; for instructions on entering the designers, see Editing Label and Report Templates.
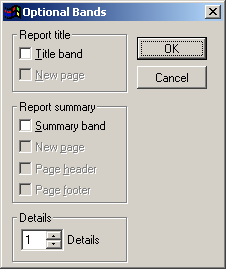
While in the Label or Report Designer, click on the Report menu, and then select Optional Bands. The Optional Bands window will appear, as shown:

Check the desired options. Descriptions are provided below:
Title Band Options
Title Band - Creates a Title band in the Label or Report that prints once per print job.
New Page - Issues a page eject command to the printer after the title is printed.
Summary Band Options
Summary Band - Creates a Summary band in the label or report that prints once per print job.
New Page - Issues a page eject command before the summary is printed
The Page Header and Page Footer options are unused.
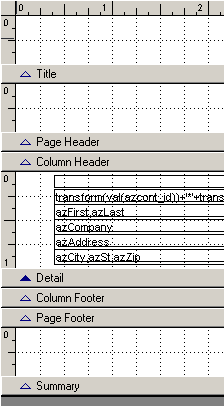
Click OK to close the Optional Bands window and return to the Label or Report Designer. You will then see the new band(s) displayed in the design view:

You can now adjust the Title and Summary bands using the methods described in the Page Layout and Page Setup topic. Any information you create within the Title or Summary area will only print at the beginning or end of the print job, respectively.