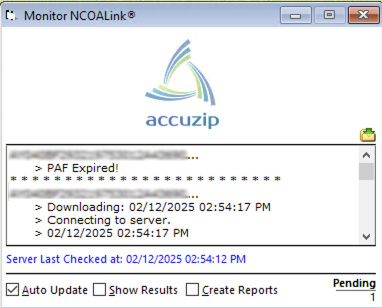
PAF Expired! Message during NCOALink processing
During the NCOALink process of the address validation feature, you may receive a PAF Expired! message that prevents NCOALink from completing and updating your database. The instructions below will help you fix this.
- Exit the AccuZIP6 program.
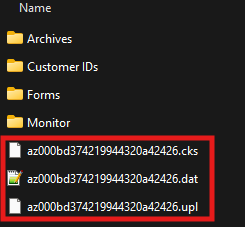
- Browse to C:\Program Files (x86)\AccuZIP6 5.0\iNcoalink\
- In that folder, you'll see some folders and some files. Delete the loose files. Do not touch the Archives, Customer IDs, Forms or Monitor folders.
- Launch AccuZIP6 and open a database. If the Script window is open, close the Script window.
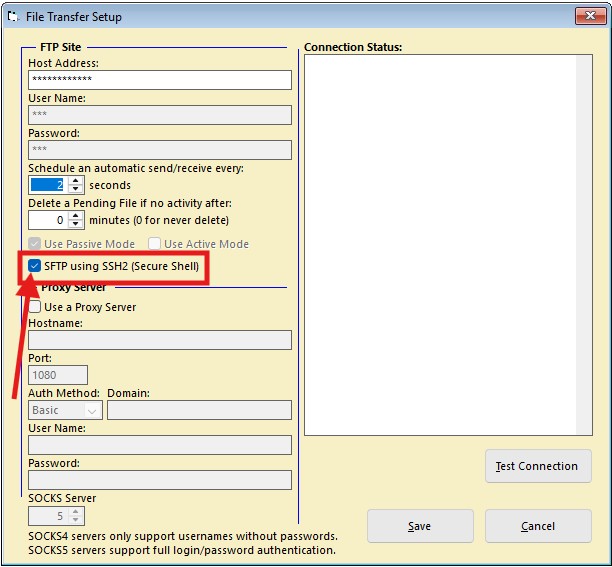
- Pull down the Additions menu to Move Update > FTP Connection Setup
- Check the box labeled SFTP using SSH2 (Secure Shell) and click Save
- Open any database using File menu > Recent Databases
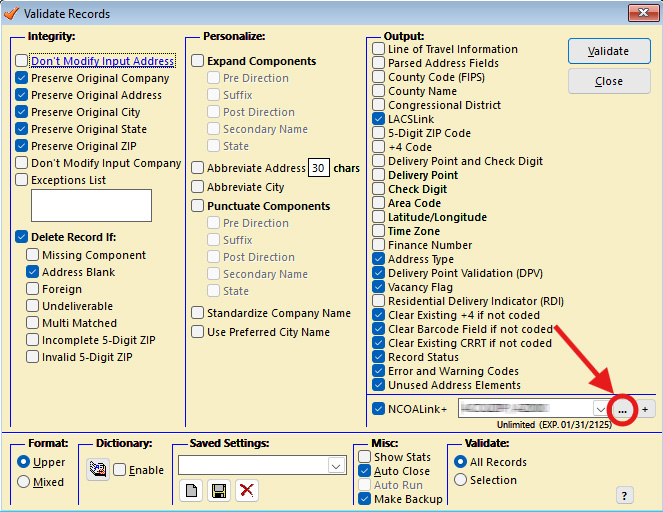
- Under the Special menu, choose Validate Records
- Select your company name from the NCOALink pull-down menu, then click on the ellipsis button to the right of the pull-down menu
- In the Mail List Owner screen, make sure the Mail List Owner Information section is completely populated, as well as the Broker section. This means that every box that has a red border must be completed.
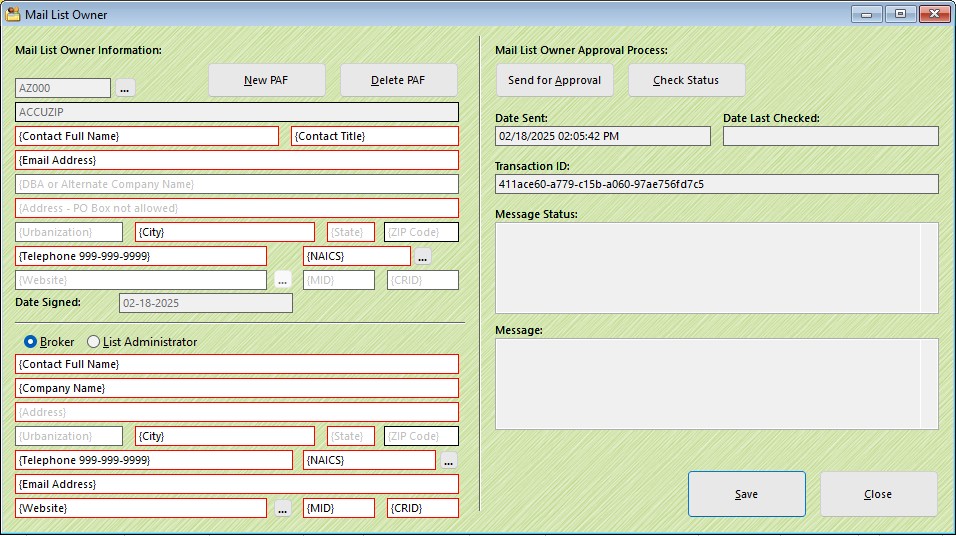
A special note about the Website in the Broker/List Administrator section:
Entering a web page URL in the Broker/List Administrator section is mandatory. When the Approve button is clicked in the USPS Processing Acknowledgement Form-Approval email (details of this appear below), the person who clicked on the Approve button will be directed to that web page. If you don't have a web page URL to enter into that box, you could use https://www.accuzip.com/forms/paf-thanks.htm, which is a generic "Thank You" page that doesn't have links to any other pages.
- Once completed, click Send for Approval.
Note the email address in the Mail List Owner information section. An email with the subject line USPS Processing Acknowledgement Form - Approval will be sent to that email address.
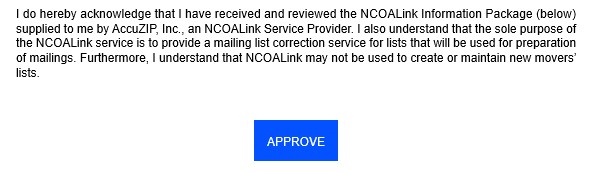
- Open the email and click on the blue Approve button.
- Returning to the AccuZIP6 Validation screen, click on the ellipsis button next to the NCOALink pull-down menu again, and it should show that the PAF was approved with the Message box reading: The Mail List Owner approved the PAF.
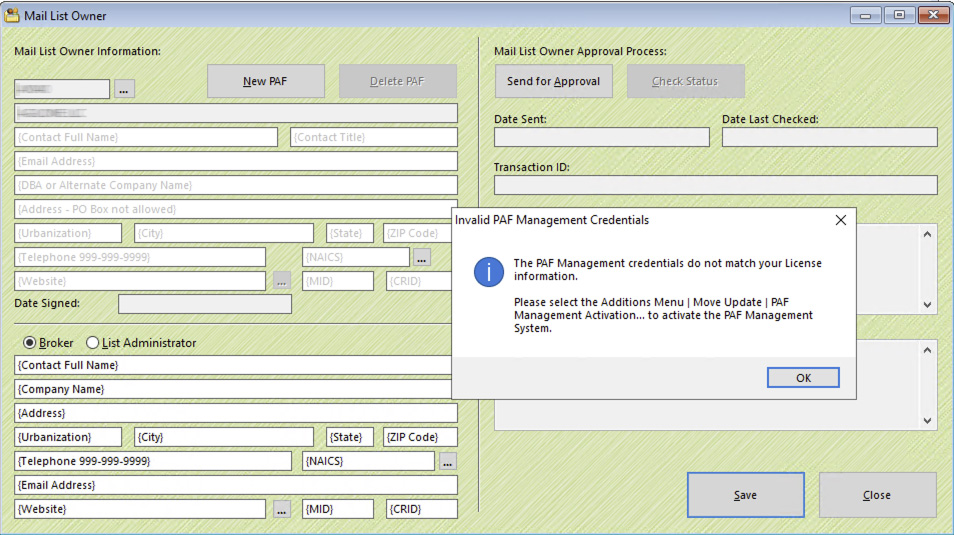
If you enter the Mail List Owner screen and immediately receive an error message indicating you need to activate the PAF Management System, use the instructions below to fix this, and then repeat the steps above to complete the Mail List Owner and Broker sections of the PAF, and approve the PAF.
Close the address validation screen.
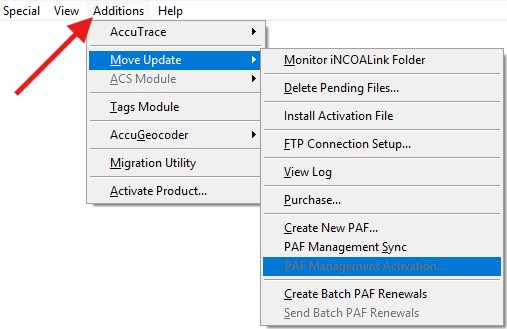
From the Additions menu, choose Move Update > PAF Management Activation
Enter your UUID into the PAF Management Activation screen. Don't have your UUID? Retrieve it from Chatbot by making this request:
I need a UUID for Account # 1111111111
(but use your 10-digit AccuZIP6 account number)
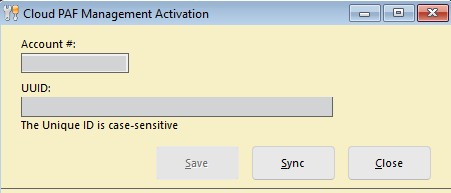
Click Save. What if nothing happens when I click Save?
Now use the instructions above to populate the Mail List Owner and Broker sections of the PAF.
- Once completed, click Send for Approval.
Note the email address in the Mail List Owner information section. An email with the subject line USPS Processing Acknowledgement Form - Approval will be sent to that email address.
- Open the email and click on the blue Approve button.
- Returning to the AccuZIP6 Validation screen, click on the ellipsis button next to the NCOALink pull-down menu again, and it should show that the PAF was approved with the Message box reading: The Mail List Owner approved the PAF.
- Take a screenshot of this Mail List Owner screen and email it to frontdesk@accuzip.com with your 10-digit account number in the signature line
Once you receive a reply from frontdesk@accuzip.com, your NCOALink processing will work again.
What if nothing happens when I click Save after entering the UUID into the Cloud PAF Management Activation Screen?
This means the IP address of the registration server AccuZIP6 is trying to visit is being changed by your ISP, which prevents AccuZIP6 from reaching the server. To keep this from happening, follow the steps below.
- Open Notepad as administrator (Type NOTEPAD into your search bar, right-click on it, and choose Run As Administrator).
- In Notepad, pull down the File menu to Open. Navigate to C:\Windows\System32\drivers\etc and open the hosts file. Then copy and paste the following to the bottom of the file:
# To allow AccuZIP6 to properly connect to the registration server for DES and PAFMS
34.107.191.178 api.trackmypiece.app
# End of AccuZIP6 section
-
Save and close the file. Now you can paste the UUID into the Cloud PAF Management Activation Screen and click Save.
Back to where I left off in the instructions